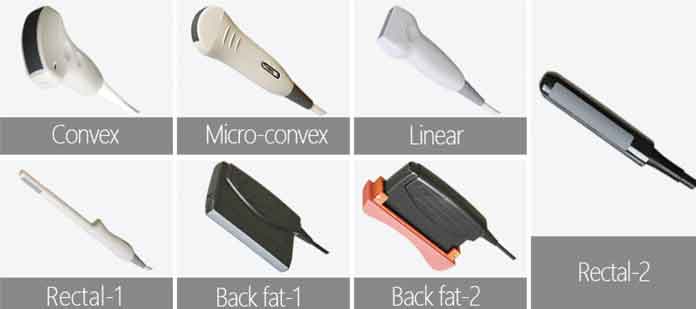
For veterinary professionals, an ultrasound machine is an essential diagnostic tool. To ensure it continues to provide clear, accurate images and to maintain a sanitary environment, proper cleaning and disinfection of the ultrasound probe are critical. Not only does this protect animal patients from cross-contamination, but it also extends the life of your equipment.
The Importance of a Clean Ultrasound Probe
Think of the ultrasound probe as the frontline of your diagnostic work—it’s the part of your equipment that has direct contact with every patient. Proper cleaning and disinfection are non-negotiable for two key reasons:
- Patient Safety: Animals can carry pathogens like bacteria and viruses on their skin. Without proper disinfection, these pathogens can be transferred from one patient to the next, potentially causing infections. This is especially critical when the probe is used on broken skin or mucous membranes.
- Equipment Longevity: Ultrasound probes are highly sensitive and expensive pieces of equipment. Leaving old gel or using harsh chemicals can corrode the delicate acoustic window and electrical components, leading to blurry images, signal dropouts, and premature equipment failure. Protecting your investment starts with proper daily care.
The Basics: A Step-by-Step Guide
Here is a simple, step-by-step guide to cleaning your veterinary ultrasound probe correctly.
1. Initial Cleaning (Pre-Cleaning)
The first step after every single use is to remove the ultrasound gel and any other visible debris from the probe. Ultrasound gel is water-based, which makes this initial cleaning quick and easy.
- Use a soft, damp cloth to gently wipe the probe’s acoustic window (the part that touches the animal) and cable.
- Avoid using abrasive paper towels or cloths, as these can scratch the delicate surface of the probe.
- For any stubborn gel or debris in crevices, you can use a soft-bristled brush, but be careful not to damage the probe’s head.
After you’ve removed all the visible gunk, use a dry, lint-free cloth to thoroughly dry the probe. This prevents moisture from getting into the delicate electrical components.
2. Disinfection: The Crucial Next Step
Cleaning removes visible dirt, but disinfection kills the pathogens that can cause infection. The level of disinfection you need depends on the type of procedure you performed.
- Low-Level Disinfection: For external exams on intact skin, a low-level disinfectant is typically sufficient. Many veterinary-grade disinfectant wipes are suitable for this purpose. Look for products that are approved by the manufacturer of your ultrasound machine.
- High-Level Disinfection: For interventional procedures or exams where the probe comes into contact with non-intact skin or mucous membranes, high-level disinfection is mandatory. This often involves specific disinfecting solutions that the probe is soaked in for a set amount of time.
No matter which level you need, always follow these rules:
- Check compatibility: Before using any chemical, confirm that it’s safe for your specific probe model. Harsh chemicals like pure alcohol, acetone, or bleach can damage the probe’s housing and acoustic window over time.
- Read the instructions: Always follow the disinfectant manufacturer’s instructions for contact time—the amount of time the disinfectant needs to remain wet on the surface to be effective.
- Don’t submerge the entire probe: Only the part of the probe that is meant to be disinfected should be placed in the solution. Never submerge the connector end of the probe.
3. Final Rinse and Storage
After disinfection, rinse the probe with water to remove any chemical residue, then dry it completely with a clean, lint-free cloth. Once dry, store the probe properly in its designated holder or case to protect it from accidental drops or damage.
The Consequences of Improper Cleaning
Neglecting proper cleaning and disinfection can have serious repercussions:
- Increased Risk of Infection: Contaminated probes can act as a vehicle for spreading infections among your patients, jeopardizing their health and your clinic’s reputation.
- Degraded Image Quality: Residual gel and buildup on the probe’s surface can interfere with the transmission of sound waves, leading to poor image resolution and inaccurate diagnoses.
- Expensive Repairs or Replacement: Damaged probes due to chemical exposure or physical wear are costly to repair or replace, significantly impacting your clinic’s budget.
By following these simple steps, you can ensure your veterinary ultrasound probe remains clean, functional, and ready for your next patient, protecting both your equipment and the animals under your care.
Post time: Aug-26-2025


