


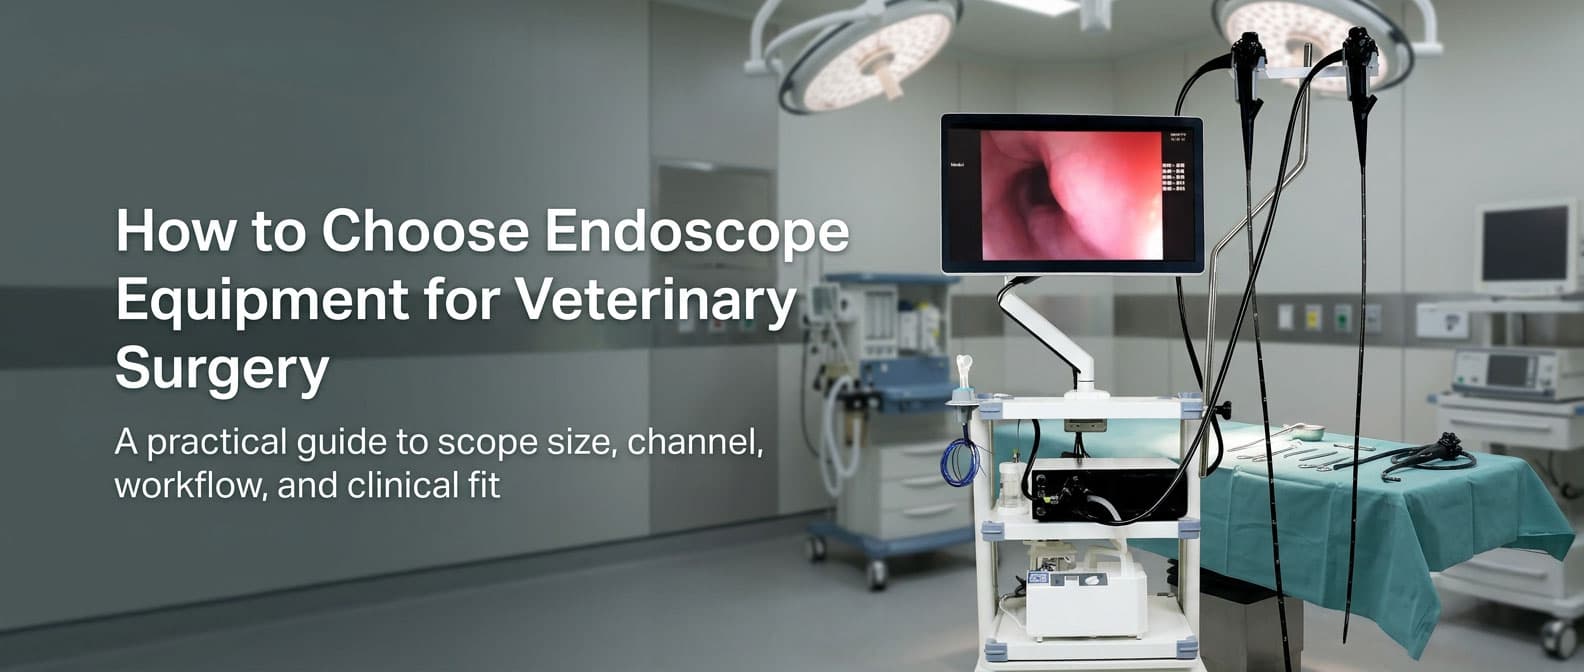
Choosing endoscope equipment for veterinary surgery is rarely a one-line decision. The right system depends on what you actually do in the room, which patients you see most often, how far you want your endoscopy service to grow, and whether your team needs a compact, integrated workflow or a broader premium setup with more expansion headroom.
Some clinics buy around image quality alone and regret the channel size later. Others focus on price and discover that the scope diameter or working length limits their caseload. A few end up with equipment that looks impressive but feels awkward in real procedures. That happens more often than people admit.
A better approach is to think like a clinician and a buyer at the same time.
Quick answer: what should you look at first?
If you want the short version before the deep dive, start here:
- Procedure type — upper GI, lower GI, biopsy, foreign body retrieval, or mixed endoscopy work
- Patient size — cats and small dogs need different scope logic than larger dogs
- Scope diameter — too large cuts you out of smaller cases; too small can reduce versatility
- Working length — especially important if you plan to reach deeper in larger dogs
- Working channel — critical if you want meaningful biopsy and accessory use
- Angulation and handle ergonomics — a scope that feels clumsy will slow every case down
- Tower workflow — monitor, light source, air/water, image processor, and storage all matter
- Support and downtime — warranty, training, repair speed, and loaner availability should not be afterthoughts
That is the skeleton. Now let’s put some muscle on it.
1) Start with the procedures, not the brochure
Before comparing brands, define what your veterinary surgery team actually needs the system to do.
If your service is mostly gastroscopy, biopsy, and foreign body retrieval, then a flexible veterinary endoscope will be the center of the decision. If you also plan to do lower GI work, scope length and channel size become even more important. If your hospital performs broader minimally invasive work, you may end up evaluating both rigid and flexible platforms together.
That distinction matters. Flexible endoscopes are typically preferred for GI navigation. Rigid scopes remain useful for selected body cavities and specific indications, but they do not replace a true flexible GI endoscopy system.
So ask the blunt question early:
Are we buying for occasional diagnostics, or are we building a reliable veterinary endoscopy service line?
Those are not the same purchase.
2) Scope diameter decides who you can treat comfortably
Diameter is not just a number on a specification sheet. It determines access, handling, patient fit, and how broadly the system can be used.
Veterinary guidance has long suggested that a gastroscope under 9 mm is practical for many canine and feline patients. Separate GI guidance has also recommended choosing the largest diameter the patient can reasonably accommodate, because larger scopes may offer stronger handling and better accessory capability. Both statements are true. That is why buying a single “one size fits all” scope often becomes a compromise.
Practical diameter logic
| Patient / use case | Typical buying logic | Why it matters |
|---|---|---|
| Cats and small dogs | Slimmer insertion tube preferred | Easier passage and broader clinical usability |
| Medium dogs | Mid-size flexible scope often works well | Balances access and working capability |
| Large dogs / broader GI service | Larger-diameter option may be preferred | Improves handling and often supports larger accessory pathways |
For clinics serving mixed companion-animal caseloads, a platform with more than one scope size often makes far more sense than trying to force every case through one diameter.
That is one reason systems such as the AEG 200 Veterinary Endoscopy System can be practical in daily use: the availability of 6.0 mm and 8.8 mm gastroscope options gives hospitals a more flexible way to match equipment to patient size.
3) Working length becomes a real issue faster than people expect
Working length sounds technical until a bigger dog is on the table and you realize the scope you bought is simply not enough.
Published veterinary references commonly place flexible endoscope working lengths in a broad range from roughly 55 cm to 170 cm, with many GI scopes falling between 100 cm and 170 cm. For large- and giant-breed dogs, lower GI guidance has noted that at least 140 cm may be needed to evaluate the ascending colon, cecum, or ileum.
That should immediately change how you think about purchasing.
Working length guide
| Clinical scenario | Length logic |
|---|---|
| Routine upper GI in many dogs and cats | 100–140 cm often covers common needs |
| Broader upper GI versatility | Longer scope adds flexibility |
| Large-dog lower GI evaluation | 140 cm or more may be necessary |
| Growth-focused hospital | Buy for tomorrow’s cases, not only today’s routine cases |
If your team plans to expand into more advanced or deeper GI work, under-buying on length is one of the easiest ways to limit yourself.
4) The working channel may matter more than the image quality you fall in love with
This is where many purchases go sideways.
A beautiful image can impress at a demo. A cramped channel frustrates you every week.
The working channel determines what instruments can be passed through the scope: biopsy forceps, retrieval tools, and other accessories. Guidance from veterinary GI sources has repeatedly emphasized that a channel of 2.8 mm or greater is highly desirable when meaningful biopsy work is part of the plan.
Channel size guide
| Working channel | What it generally means in practice |
|---|---|
| Smaller channel | May work for lighter-duty use or smaller cases, but limits accessory flexibility |
| Around 2.8 mm | Strong practical target for many biopsy and retrieval workflows |
| Larger channel configurations | More room for accessory confidence, especially in bigger patients |
In other words, channel size is not a detail. It is a strategic choice.
A system that pairs a smaller-diameter scope for narrower patients with a larger-channel option for bigger or more instrument-heavy work gives a hospital more freedom. That is why a 6.0 mm / 2.0 mm and 8.8 mm / 2.8 mm pairing is clinically easier to defend than a one-scope-only compromise.
5) Angulation and handle comfort will shape every procedure
A scope can have sharp imaging and still be annoying to use.
That annoyance adds up.
Flexible GI work depends on controlled tip deflection, smooth steering, stable visualization, and handle ergonomics that do not force awkward hand movements. Four-way angulation remains a practical baseline. The handle should feel intuitive. The buttons should be placed where a clinician can use them under pressure without breaking flow.
That includes:
- freeze
- photo / video capture
- brightness adjustment
- white balance
- zoom or image enhancement controls
A scope that feels right in the hand tends to get used with more confidence. A scope that feels slightly off tends to expose that weakness in difficult moments rather than easy ones.
6) Image quality is more than resolution
People love to ask whether a veterinary endoscopy system is HD. Fair enough. But resolution is only one piece of the picture.
Clinical image quality also depends on:
- illumination stability
- white balance behavior
- brightness adjustment
- image enhancement
- monitor output quality
- how well the lens stays usable when irrigation is needed
You are not buying a television. You are buying decision support.
Clear mucosal detail, edge definition, vascular visibility, and dependable performance in less-than-perfect views matter more than a simple spec headline. In real use, the better question is this:
Can the system keep the image clinically useful when the case is messy, not only when the demo is clean?
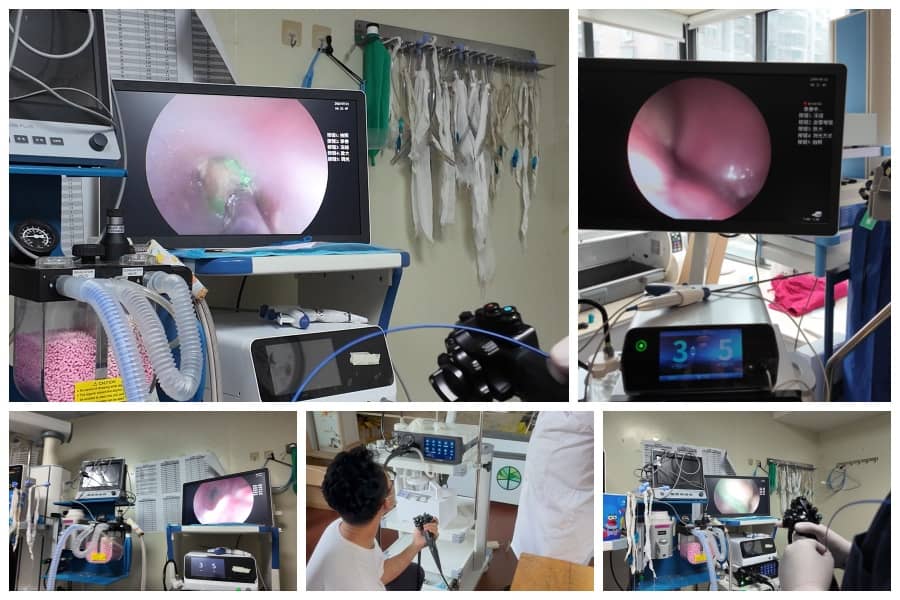
7) Buy the tower, not only the scope
A veterinary endoscopy system is not a scope floating in space. It is an operating ecosystem.
If the monitor, host unit, light source, air pump, irrigation pathway, suction logic, image storage, and accessory compatibility do not work together smoothly, the whole room feels it.
What to evaluate in the full system
| Component | What to look for |
|---|---|
| Monitor | Clear image, good visibility, reliable output |
| Processor / host unit | Stable imaging, intuitive controls, dependable response |
| Light source | Consistent illumination without fighting the operator |
| Air / water / suction | Practical, testable, reliable during procedures |
| Recording / storage | Simple capture and playback workflow |
| Handle design | Natural grip and easy button access |
| Cleaning workflow | Practical for real staff, not just ideal conditions |
This is where integrated systems often become attractive. A unit that combines core functions into a cleaner operational platform can reduce setup friction and training burden. That makes a meaningful difference in busy hospitals that do not want a room full of loosely connected boxes and adapters.
8) Brand comparison: what buyers usually weigh
Not every hospital shops the same way, but the comparison conversation often circles around a few familiar groups: legacy premium brands, practical mid-market systems, and value-oriented platforms.
Below is a simplified comparison framework. It is not a ranking. It is a buying lens.
| Brand / type | Typical market perception | Strengths buyers often note | Buying cautions |
|---|---|---|---|
| KARL STORZ | Premium legacy brand | Reputation, established ecosystem, broad professional familiarity | Higher budget threshold, premium pricing logic |
| VetOvation | Practical veterinary-focused option | Accessibility, flexible system offerings, broad veterinary relevance | Configuration decisions still need close attention |
| Eickemeyer / similar integrated systems | Multi-use and mobile workflow appeal | Ease of use, bundled logic, broader clinical coverage in some setups | Must check exact scope compatibility and workflow fit |
| Mid-market integrated systems such as AEG 200 | Balanced clinical utility with accessible system logic | Integrated workflow, multiple scope options, practical feature set | Buyers should still compare service, support, and long-term platform fit |
This is where the conversation should stay grounded. A premium brand may be the right answer for one hospital and an unnecessary overreach for another. A mid-market system may be the smartest choice for a clinic that wants reliable GI capability, manageable workflow, and room to grow without overspending on prestige alone.
9) What about price?
Yes, price matters. It should.
The problem is that veterinary endoscopy pricing is often fragmented in public channels. Many manufacturers do not publish complete system pricing in a fully standardized way. Still, publicly visible listings and market commentary can give buyers a rough directional sense.
Publicly visible pricing signals
| Public signal | What it suggests |
|---|---|
| Some accessory or partial flexible endoscope listings appear in the low-thousands range | Not all listings represent a complete endoscopy tower |
| Complete veterinary flexible endoscopy systems can publicly list around $28,500 in some online channels | Complete packages cost far more than a single accessory or partial component |
| Market commentary in vendor content has suggested many veterinary endoscopy purchases broadly fall around $7,000 to $30,000+ depending on scope type, inclusions, and configuration | Real-world cost depends heavily on whether you are buying a complete system, a scope only, pre-owned equipment, or a bundled package |
So, when comparing price, make sure you are comparing the same thing.
Not this:
- one listing for a single accessory
- another for a pre-owned scope
- another for a complete tower with monitor and processor
That is how price comparisons become useless.
A better budget framework
| Budget tier | What buyers often expect |
|---|---|
| Entry / limited-use budget | Narrower application range, fewer integrated features, possible compromises in channel or workflow |
| Mid-market budget | Best balance for many hospitals: usable imaging, practical tower logic, clinically relevant scope options |
| Premium budget | Strong brand reputation, broader ecosystem, more advanced upgrade paths, higher acquisition cost |
The smartest buyers do not simply ask, What is the cheapest veterinary endoscope? They ask, What system gives us the best clinical return for the next three to five years?
10) A structured buying checklist
Here is a cleaner way to evaluate a system before signing anything.
Core buying checklist
| Question | Why it matters |
|---|---|
| What procedures will this system support in year one? | Prevents overbuying or underbuying |
| What patient sizes dominate our caseload? | Drives diameter and length logic |
| Is the channel large enough for our biopsy and retrieval work? | Protects clinical usefulness |
| Is the scope easy to steer and comfortable to hold? | Direct impact on procedure workflow |
| Are monitor, processor, and controls intuitive? | Affects speed, training, and consistency |
| How hard is it to clean, store, and maintain? | Impacts daily adoption |
| What warranty and service terms are offered? | Reduces downtime risk |
| Is there loaner support if the scope goes down? | Protects continuity of care |
11) Where a system like AEG 200 fits naturally
A system does not need to be oversold to belong in the conversation.
If a hospital is looking for a veterinary endoscopy system that offers:
- HD imaging
- integrated host unit workflow
- practical handle controls
- IP67-rated insertion tube construction
- multiple gastroscope size options
- a setup that can make sense for both smaller and larger animal GI work
then the AEG 200 Veterinary Endoscopy System fits naturally into a shortlist discussion.
That is the key word here: shortlist.
It does not need dramatic claims. It only needs a fair clinical question:
Does this platform match our caseload, our budget range, and the way our team actually works?
If the answer is yes, then it deserves serious attention.
Final thought
The best endoscope equipment for veterinary surgery is not the one that looks most impressive in a product flyer. It is the one that keeps proving useful once the room is busy, the patient is not straightforward, and the team needs clear imaging, reliable control, and tools that actually fit the job.
Choose for the cases you do every week.
Choose for the service you want to build next.
And choose with enough discipline to compare the scope, the tower, the accessories, the workflow, and the support as one clinical system rather than as a stack of unrelated boxes.
Post time: May-20-2026