


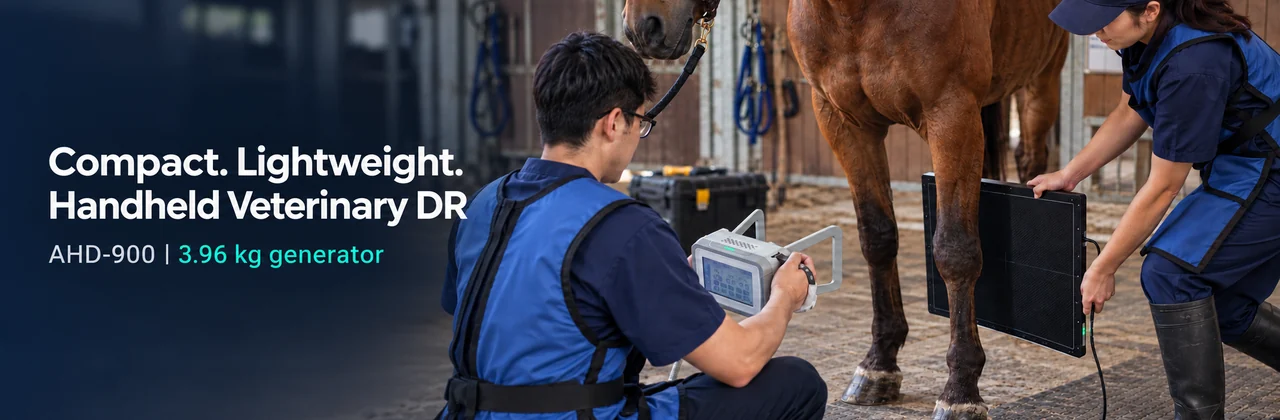
By workflow need, not by the word “portable”: A handheld veterinary DR setup pairs a movable X-ray generator with a digital detector and acquisition workstation. The right choice depends on the species and projections you image, detector and software workflow, field conditions, and how your practice will manage radiation safety.
Veterinary digital radiography (DR) can bring image capture and review into a clinic room, treatment area or suitable field location. But “handheld” describes the X-ray source; it does not mean that the detector, workstation and complete system are wireless or weigh the same as the generator alone. Before comparing models, map the entire imaging workflow to your caseload.
What is a handheld veterinary DR system?
A handheld veterinary DR system typically consists of an X-ray generator, a separate digital flat panel detector, and acquisition software on a workstation. The generator produces the X-rays; the detector captures the transmitted image; the workstation displays, processes, stores and, where configured, transfers it. Digital radiography allows electronic image review and transmission, while positioning and technique remain central to image quality [1].
Check what “handheld” applies to on the specification sheet. Compare the generator’s weight with the total kit weight, including the detector, battery or power adapter, cables, computer, case and positioning aids. Also establish whether the detector uses a cable or wireless connection and what power it needs. A battery-powered generator does not by itself make the full DR system wireless.
Where can handheld DR fit in companion animal practice?
For dogs and cats, radiography is commonly used to evaluate the thorax, abdomen and musculoskeletal system. A movable source can be useful when the patient is in a treatment area, isolation space or other examination location where moving the animal to a dedicated room is difficult. The detector still needs to be positioned for the projection, and the operator needs a technique appropriate to the patient and body region.
Good radiographs depend on more than detector resolution. Merck Veterinary Manual notes that positioning affects diagnostic content and that additional views can be needed; for example, a complete canine or feline thoracic study commonly includes right and left lateral views and a VD and/or DV view [1]. A single exposure should not be presented as a complete study when the clinical question calls for multiple projections.
Small or painful patients may be difficult to position consistently. Plan restraint, positioning supports and, when clinically appropriate, sedation according to veterinary judgement and local practice. Merck also cautions that manual restraint increases exposure to both the patient holders and the personnel involved, reinforcing the value of careful positioning and minimizing repeats [1].
What changes in equine field radiography?
Equine radiography often happens where the horse is standing: in a stable, examination area or field setting. Portable equipment can help bring the source and detector to the horse, especially for selected distal limb examinations. It does not remove the need for a stable, level stance, accurate alignment or a safe working area.
AAEP’s practical radiology guidance describes the horse standing squarely for distal limb views and emphasizes that small positioning differences can materially change how anatomy appears on a two-dimensional image [2]. The required views depend on the clinical question and anatomy. An equine examination plan should therefore be based on the veterinarian’s protocol, not on a general claim that one detector exposure covers every limb or case.
Before a field call, confirm that the panel can be placed securely, the generator can be aligned to the target anatomy, the workstation can be powered and used at the site, and the team can control access around the exposure. Consider ground conditions, lighting, weather limits stated by the manufacturer, cable routing, animal movement and a way to transport and protect the detector.
What specifications should a practice compare?
Use the specifications to answer practical questions rather than treating the largest number as the best system.
| Component | What to compare | Why it matters |
|---|---|---|
| X-ray generator | Weight, dimensions, maximum output, kV and mA ranges, exposure-time range, focal spot and power source | Determines how the source can be carried, positioned and set for the intended examination protocols. Maximum output alone does not establish performance for every patient or projection. |
| Collimator and positioning aid | Adjustable field and visible positioning light | Helps the operator align and limit the field to the intended anatomy before exposure. Collimation is also a core radiation-protection practice. |
| Flat panel detector | Imaging area, pixel pitch, matrix, bit depth, spatial resolution, cable or wireless interface, power and detector weight | Determines the receptor area and describes sampling and digital conversion. These figures do not guarantee a diagnostic result by themselves; positioning, motion, exposure and image processing also matter. |
| Acquisition workstation | Supported software, display, storage, export, network and DICOM/PACS functions | Defines where images are reviewed and how they enter the practice’s record and archive workflow. Confirm licenses and compatibility with the current PACS. |
| Complete kit | Total carry weight, case, cables, adapters, accessories, warranty, service and training | Shows whether the quoted package is ready for the clinic room or field workflow you intend to use. |
For a concrete example, the AHD-900 900W Handheld Veterinary DR System combines a 3.96 kg battery-powered generator with a separate 17 × 17-inch-class detector. The specified detector uses a wired GigE connection and needs its own power adapter, so plan the full setup around the detector, workstation and cables at the examination site. The stated 3.96 kg is the generator weight, not the total kit weight. Compare this configuration with your species, projections and software needs before requesting a quotation.
How should the imaging workflow be planned?
- Define the clinical question. Decide which anatomy and projections are needed before moving equipment into position.
- Prepare the animal and site. Establish safe positioning, reduce avoidable movement, and arrange the detector and supports.
- Choose an appropriate technique. Use the manufacturer’s technique chart and the clinic’s validated protocol for the patient, thickness and anatomy.
- Align and collimate. Place the receptor and source for the intended projection; use the positioning light and collimator if the equipment provides them.
- Make and review the exposure. Check anatomy coverage, positioning and image quality on the acquisition workstation. Decide whether another view is clinically needed.
- Save and transfer the study. Confirm patient identification, storage, backup and any configured DICOM/PACS transfer.
Fast digital display can help the team review coverage during the examination, but it does not replace appropriate projections or veterinary interpretation. Ask vendors how they measure any stated exposure-to-display time, which detector and workstation were used, and whether the quoted result applies to the package being offered.
What should a practice know about radiation safety?
Portability does not remove radiation-protection responsibilities. The American College of Veterinary Radiology emphasizes appropriate equipment training and techniques to minimize unnecessary exposure to staff, patients and the public [3]. Local rules differ, so practices should follow the requirements of their radiation regulator and responsible radiation-safety professional.
Before use, establish who may operate the equipment, staff training and monitoring requirements, controlled access, positioning and restraint procedures, protective equipment, exposure-area setup and equipment-specific instructions. Prefer positioning or restraint aids that reduce the need for a person to hold the animal during exposure where practicable. Do not treat a handheld form factor or product brochure comparison as a substitute for a site-specific safety assessment. Australia’s ARPANSA veterinary guidance likewise addresses radiation protection in the distinct circumstances of veterinary work [4].
Is handheld DR a fit for your practice?
It may be worth evaluating when your caseload calls for moving the X-ray source between suitable examination locations, providing selected equine limb imaging in the field, or creating a compact setup for clinics with limited room. A fixed or wheeled system may better suit a high-volume room with a dedicated imaging workflow. The decision depends on the full kit, examination mix, throughput, staff workflow, detector connection, software and local safety requirements.
When comparing systems, ask for the complete component list and total kit weight, a connection diagram, technique charts for your intended species and views, representative images with exposure details, software and DICOM scope, training and service terms, and confirmation of environmental operating limits. These details make product comparisons more useful than maximum output or generator weight alone.
Frequently asked questions
Does handheld mean wireless? No. It describes the source format. Detector data and power connections vary by configuration; confirm them for the complete system.
Can one handheld DR system cover both dogs and horses? A system may be configured for companion-animal radiography and selected equine limb examinations, but the appropriate use depends on the generator, detector format, patient size, projection and validated technique. Confirm the intended caseload with the supplier.
Does a larger detector automatically mean a better image? No. Detector area affects how anatomy can be positioned; pixel pitch, conversion and spatial resolution describe other detector characteristics. Positioning, motion control, exposure technique and processing remain important [1].
Should a product page promise “instant” images or low radiation? Only with a clearly defined, supportable basis. State how image-display time was measured and for which configuration. Radiation claims should be backed by appropriate test results and reviewed against local requirements.
Sources
- Merck Veterinary Manual — Radiography of Animals
- American Association of Equine Practitioners — Back to Basics: Radiology in Practice, 69th Annual Convention Proceedings (2023)
- American College of Veterinary Radiology — Radiation Safety Statement
- Australian Radiation Protection and Nuclear Safety Agency — Occupational Exposure: Veterinary Workers
Post time: Oct-22-2026