


Introduction: Why Strict Scope Reprocessing Matters in Modern Vet Clinics
Why do vet endoscopes fail sooner than expected? In many clinics, the answer is not image quality, brand, or even procedure volume alone. It is reprocessing discipline.
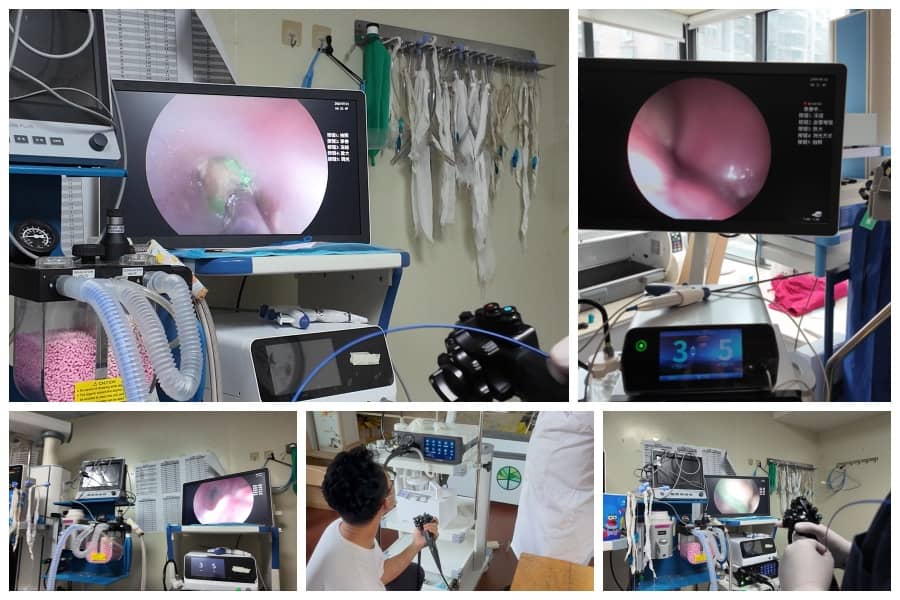
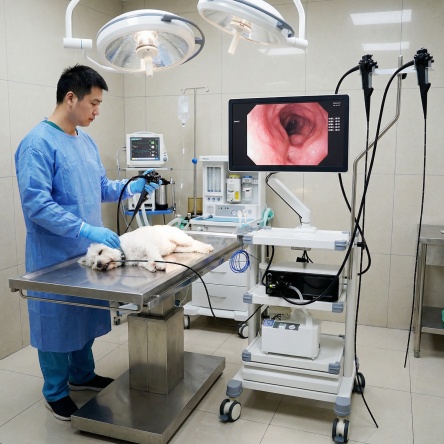
A modern veterinary endoscope system works in a punishing real-world environment. Gastrointestinal scopes and bronchoscopes are routinely used for foreign body retrieval, upper GI examination, airway inspection, and minimally invasive diagnostic workups. Meanwhile, the veterinary ultrasound probe is one of the most frequently handled imaging tools in daily practice, moving rapidly from patient to patient in abdominal, reproductive, emergency, and follow-up exams. Because both devices contact biological material so often, weak cleaning habits create a double risk: premature equipment failure and cross-contamination between patients.
That risk becomes even more serious in the Full HD era. A system such as the AEG-200 combines a 1920×1200 imaging platform with delicate optical and electronic components, plus an HD lens that still depends on careful day-to-day handling. High-resolution imaging is an advantage only when the lens, insertion tube, channels, seals, and controls are protected by a disciplined maintenance workflow. In other words, sharper pictures demand sharper habits.
If a clinic is asking either of these questions — “Why do vet endoscopes fail?” or “How can we prevent cross-contamination in a pet hospital?” — the answer usually starts with the same principle: clean immediately, test before immersion, disinfect correctly, dry completely, and store without stress on the device.
Step-by-Step Cleaning Protocol for Flexible Veterinary Endoscopes
Below is a practical reprocessing sequence for a flexible veterinary endoscope after use. The exact chemistry and contact times should always follow the OEM instructions for use, but the sequence itself should never be improvised.
Step 1: Bedside Pre-Cleaning
The first minutes after a procedure matter more than many teams realize. As soon as the scope is withdrawn, gross debris and body fluids should be removed before they dry inside the channels.
For systems such as the AEG-200, this is particularly important because the platform supports multiple insertion tube formats — including 6.0 mm, 8.8 mm, and larger configurations for different animal sizes and applications. Flush and aspirate an enzymatic solution through the relevant channels immediately after use. Wipe the exterior insertion tube with a soft, lint-free cloth dampened according to the approved reprocessing instructions.
Why is this step so critical?
- · Dried protein soil is harder to remove later.
- · Residual organic matter reduces the effectiveness of subsequent disinfection.
- · Biofilm risk rises when bedside pre-cleaning is delayed.
- · Small air/water and working channels can become partially obstructed long before the blockage is visible.
In a busy pet hospital, the easiest way to shorten scope lifespan is to let “just a few minutes” stretch into half an hour.
Step 2: Leak Testing Before Full Immersion
This is the maintenance checkpoint too many facilities underestimate.
Before the scope is fully immersed, perform a leak test according to the manufacturer’s instructions. Guidance from infection-prevention authorities places leak testing after each use and before manual cleaning. That order matters. If a scope has a compromised seal and is submerged without detection, fluid can migrate into internal components and cause damage that may not become obvious until image quality drops, buttons fail, or corrosion advances internally.
This point is especially relevant when discussing the AEG-200. The platform highlights an IP67 waterproof lens, corrosion-resistant construction, and an oil-resistant insertion tube. Those are valuable durability features, but they are not a substitute for daily leak testing. In practice, leak testing is what protects that 1080P/HD lens system and the sealed internal structure from avoidable water ingress.
Key rule: a waterproof design improves resilience, but it does not justify skipping the leak test.
Step 3: Manual Cleaning and Channel Brushing
Once leak integrity is confirmed, move to thorough manual cleaning. This is the step where staff technique often determines whether a scope stays reliable for years or starts degrading early.
For the AEG-200, available scope formats include:
- · 6.0 mm × 1000 mm configurations for smaller-animal applications
- · 8.8 mm × 1500 mm options
- · 12.8 mm × 3000 mm options for large-animal use
- · working channels that may include 3.2 mm gastroscope channels and 4.2 mm colonoscope channels on applicable configurations
That means brush selection cannot be generic. The brush must match the actual lumen diameter closely enough to contact the channel walls while still passing through smoothly over the full length of the insertion tube. A brush that is too small leaves debris behind. A brush that is too large may jam, bend, or damage the channel.
Best-practice reminders for channel brushing:
1. Use veterinary-appropriate channel brushes matched to the channel diameter.
2. Brush every accessible channel to its full usable length.
3. Repeat brushing until no visible residue appears.
4. Flush between passes rather than brushing dry debris deeper into the lumen.
5. Clean valves, caps, and detachable accessories separately if the model uses them.
With longer scopes — especially 3000 mm large-animal configurations — staff should be trained not to rush the distal portion of the pass. Incomplete brushing near the end of a long channel is a classic weak point in real clinic workflows.
Step 4: High-Level Disinfection and Rinsing
After manual cleaning, proceed to high-level disinfection (HLD) using validated chemistry and the exact required contact time. Many clinics use glutaraldehyde-based solutions or other approved HLD agents, but the correct choice depends on the scope manufacturer’s compatibility guidance.
The sequence here is straightforward, but precision matters:
- · Ensure all channels are exposed to the disinfectant.
- · Avoid trapped air that prevents full chemical contact.
- · Observe the exact soak time and concentration requirements.
- · Rinse thoroughly afterward using the water quality specified by the reprocessing protocol.
Skipping details at this stage creates two kinds of problems at once: microbial risk for the next patient and chemical residue risk for the equipment itself.
Step 5: Drying and Storage
A scope that looks clean but is stored damp is not truly reprocessed.
Use medical-grade compressed air or another validated drying method to dry all channels completely. External surfaces should also be dried carefully before storage. Authorities on flexible endoscope reprocessing stress storage conditions that both prevent recontamination and promote drying, typically through protected hanging storage without unnecessary coiling.
For the AEG-200, there is another practical handling detail worth noting: its lightweight ergonomic handpiece is designed for comfortable control during procedures, but during storage the handle and control knobs should not be squeezed, compressed, or pressed against a crowded cabinet wall. Mechanical stress on the control section can shorten service life even when the insertion tube itself appears fine.
A simple storage checklist:
- · Hang vertically when the OEM permits it.
- · Avoid sharp bends or tight loops.
- · Keep the distal tip from striking hard surfaces.
- · Ensure the handle is supported without pressure on the control knobs.
- · Store only after channels are dry.
Cross-Comparison: Cleaning Veterinary Endoscopes vs. Ultrasound Probes
One of the most common buyer questions is: Can I submerge an ultrasound probe like an endoscope? The short answer is not automatically.
A flexible endoscope is built for immersion-based reprocessing workflows defined by its manufacturer. A veterinary ultrasound probe, by contrast, follows a different risk classification and may have stricter limits on submersion depth, cable exposure, and chemical compatibility. According to current ultrasound-transducer cleaning guidance, all probes should be cleaned and disinfected after every examination, but the required disinfection level depends on how the probe is used.
- · External probes used on intact skin generally require low-level disinfection.
- · Internal or mucosal-contact probes require high-level disinfection, even when a protective cover is used, because barrier failure can occur.
- · Full immersion is only appropriate if the probe manufacturer explicitly allows it.
That is why maintenance teams should not treat an ultrasound transducer and an endoscope as interchangeable from a reprocessing standpoint.
AEG-200 vs. Veterinary Ultrasound Probe Reprocessing at a Glance
| Reprocessing point | AEG-200 flexible veterinary endoscope | Veterinary ultrasound probe / probe-based systems such as F3i-VET |
| Typical clinical role | GI exam, foreign body retrieval, airway and internal lumen visualization | Abdominal, reproductive, emergency, and follow-up imaging |
| Main contamination pattern | Internal channels + external insertion tube | Probe face, handle, cable, and sometimes internal-use contact surface |
| Immediate post-use action | Bedside pre-cleaning with wipe-down and channel flushing/aspiration | Wipe off gel and bioburden immediately after the exam |
| Leak test required? | Yes, before manual cleaning and before immersion | Not an endoscope-style leak test; follow probe-specific inspection and OEM checks |
| Brushing required? | Yes, especially for working and fluid channels | Usually no channel brushing; focus is surface cleaning and approved disinfection |
| Immersion logic | Permitted only according to the scope IFU; AEG-200 highlights IP67 waterproof protection | Not automatically fully submersible; immersion depth varies by probe design |
| Disinfection level | Typically HLD after validated cleaning sequence | LLD for intact-skin use; HLD for internal/mucosal-contact probes |
| Biggest damage risk from poor handling | Missed leak, trapped moisture, channel residue, stressed control section | Delamination, cable damage, crystal/array damage, chemical incompatibility |
| Storage priority | Dry channels completely and hang/store without compressing controls | Keep probe face protected, cable relaxed, and housing dry; avoid chemical overexposure |
This comparison is exactly why a clinic should build two adjacent but different SOPs: one for the flexible veterinary endoscope, and another for the veterinary ultrasound probe used with ultrasound platforms in the hospital. Combining them into one vague “clean the imaging devices” instruction tends to produce mistakes.
Final Takeaway
If your clinic wants to reduce repair frequency, protect image quality, and lower cross-contamination risk, the maintenance formula is not complicated — but it must be consistent.
For HD systems like the AEG-200, the essentials are clear:
- · pre-clean immediately,
- · leak test before immersion,
- · brush channels according to actual diameter and length,
- · complete high-level disinfection correctly,
- · dry thoroughly,
- · and store the scope without mechanical stress.
For every medical device maintenance program in a veterinary setting, the real goal is bigger than keeping equipment shiny. It is to preserve diagnostic confidence. A clean, well-maintained scope does not merely last longer; it performs when the case is urgent, the anatomy is difficult, and the image cannot afford to fail.
Post time: Jun-17-2026